OCR-验证码自动识别
验证码获取测试接口:https://data.gdcic.net/Dop/CheckCode.aspx?codemark=408.15173910730016
BurpSuite插件-CaptchaKiller
原 GitHub 项目地址:https://github.com/c0ny1/captcha-killer
修改版 GitHub 项目地址:https://github.com/f0ng/captcha-killer-modified

https://gv7.me/articles/2019/burp-captcha-killer-usage/
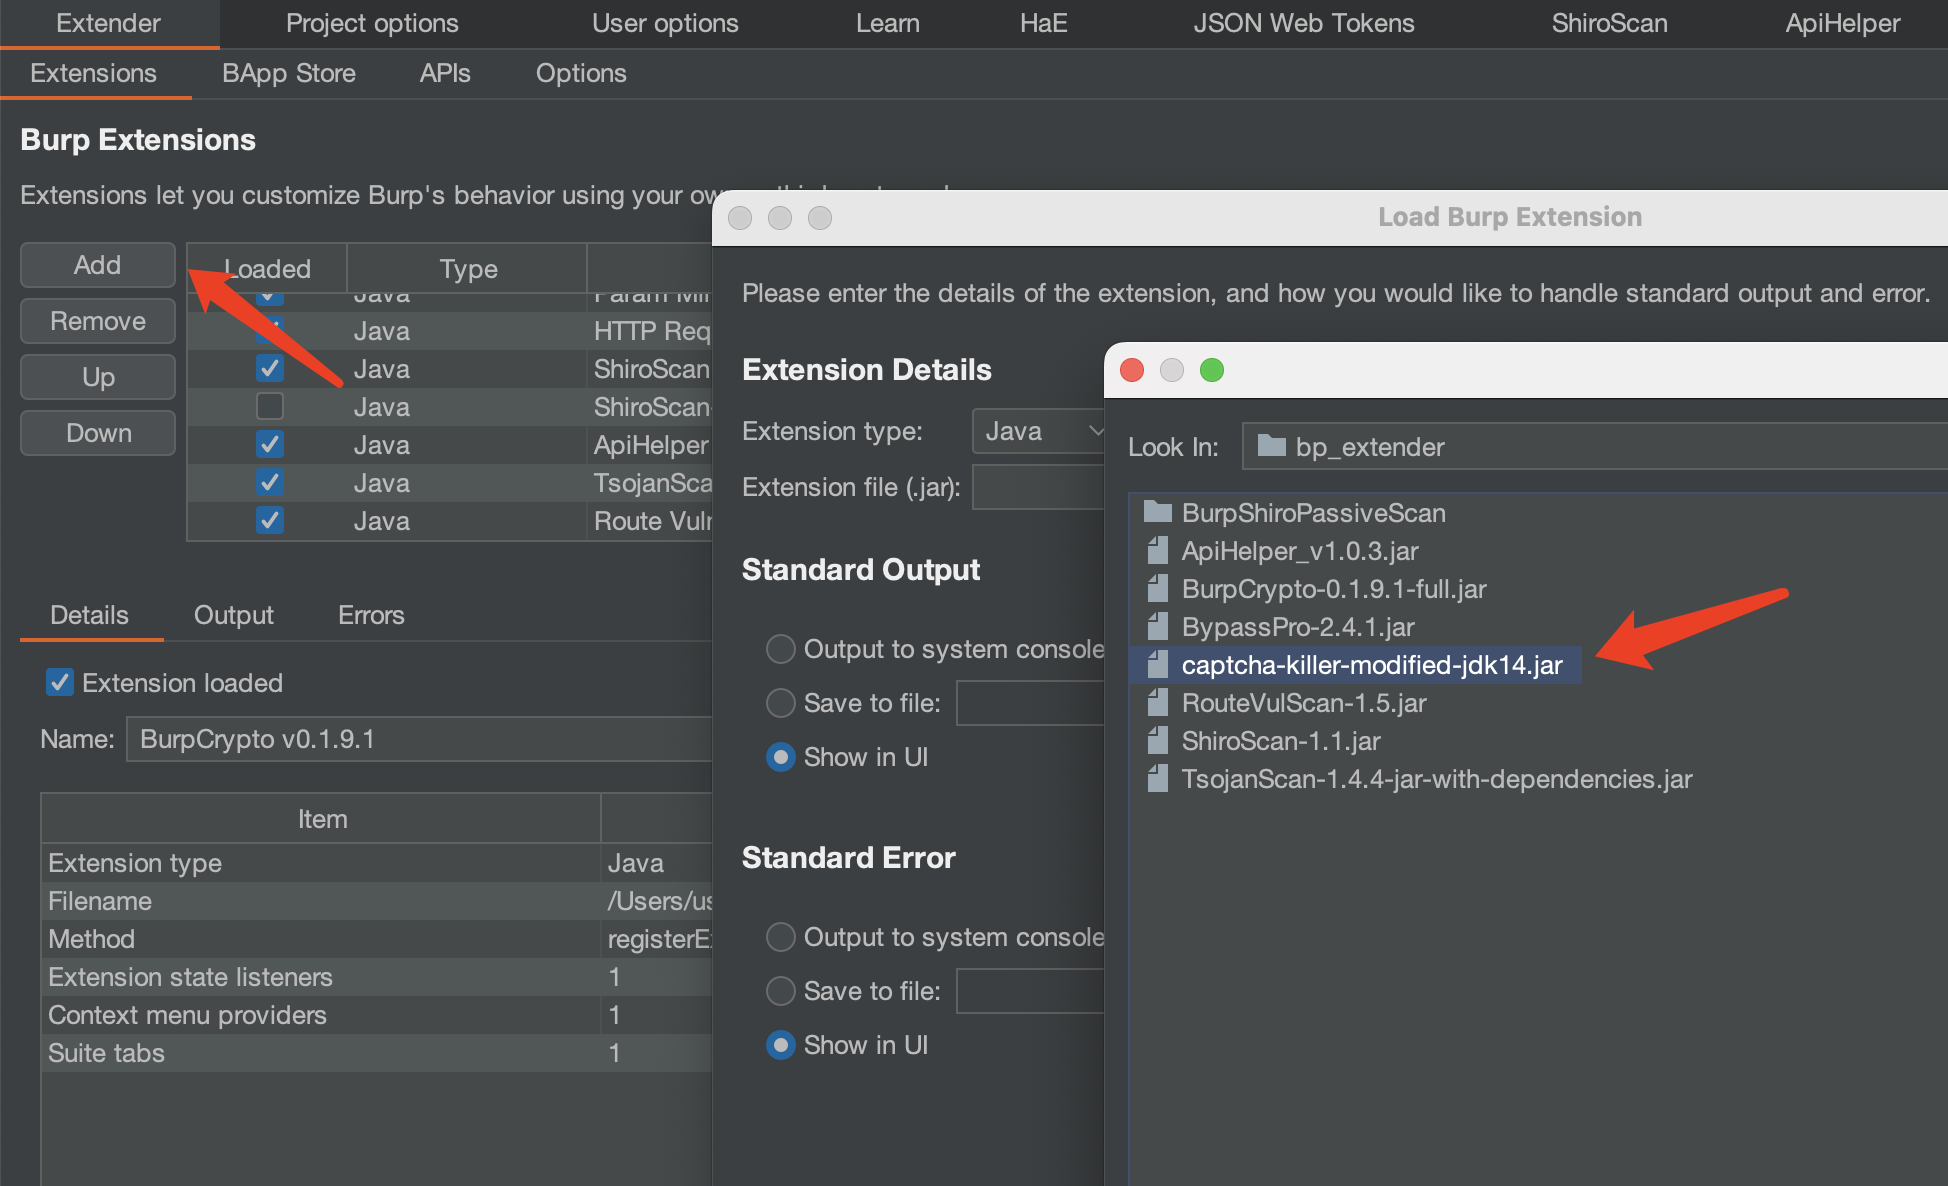
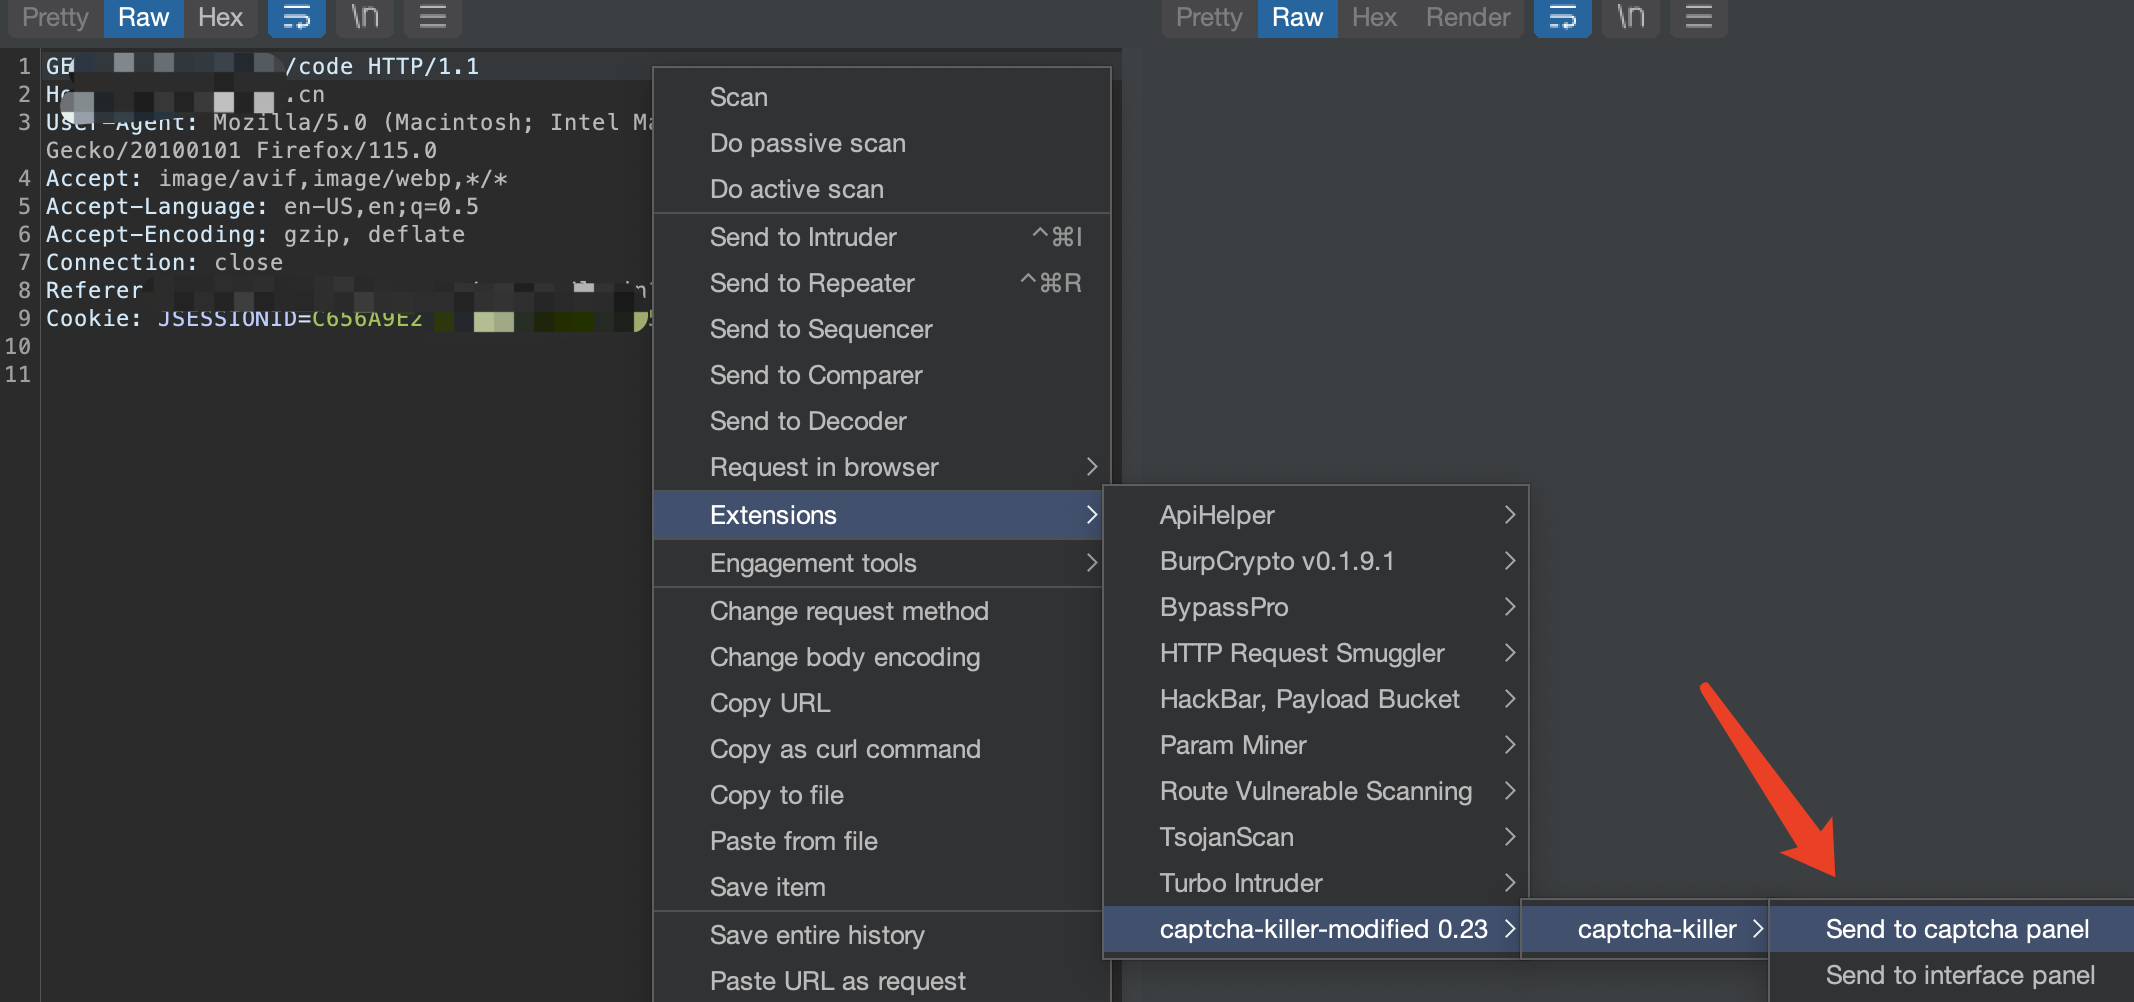
- 将获取验证码的数据包发送到插件
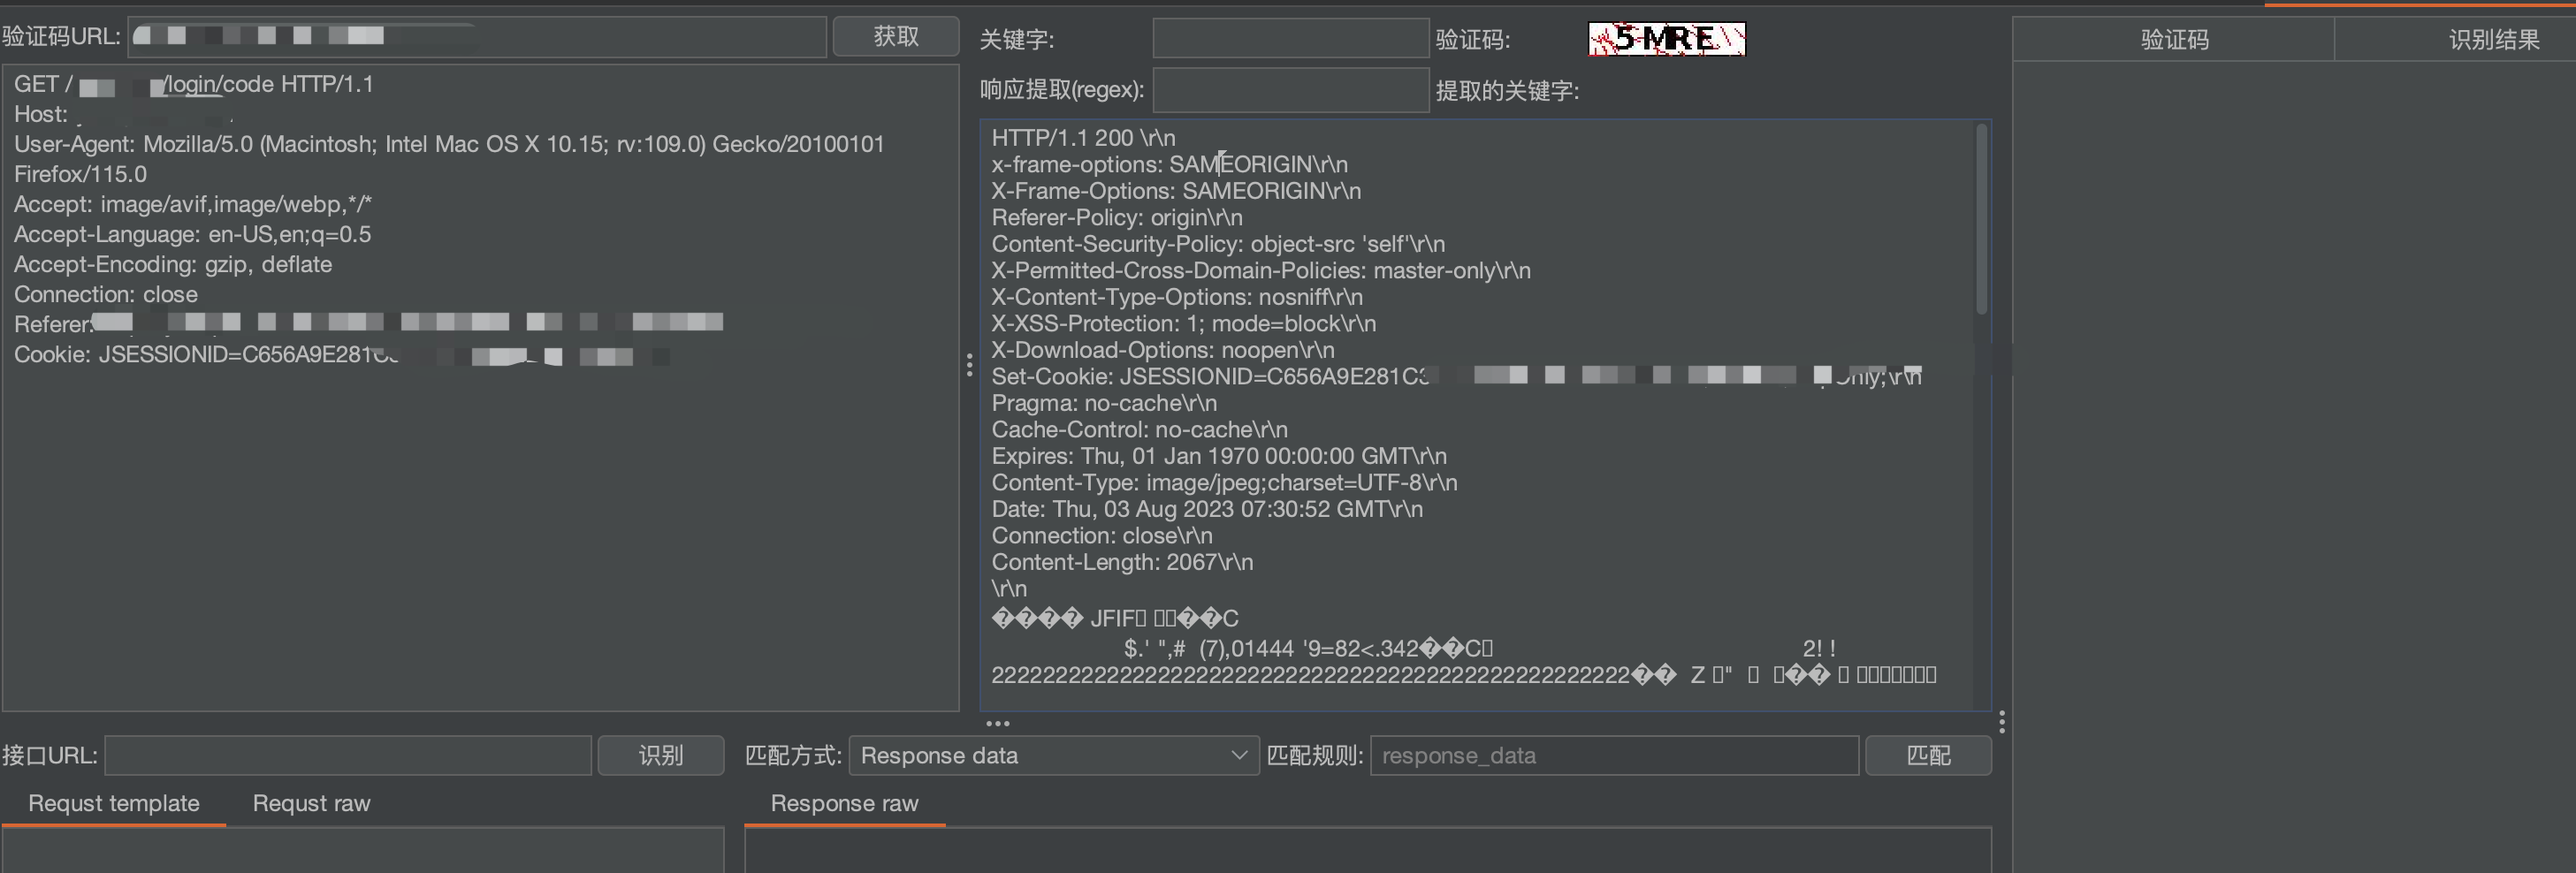
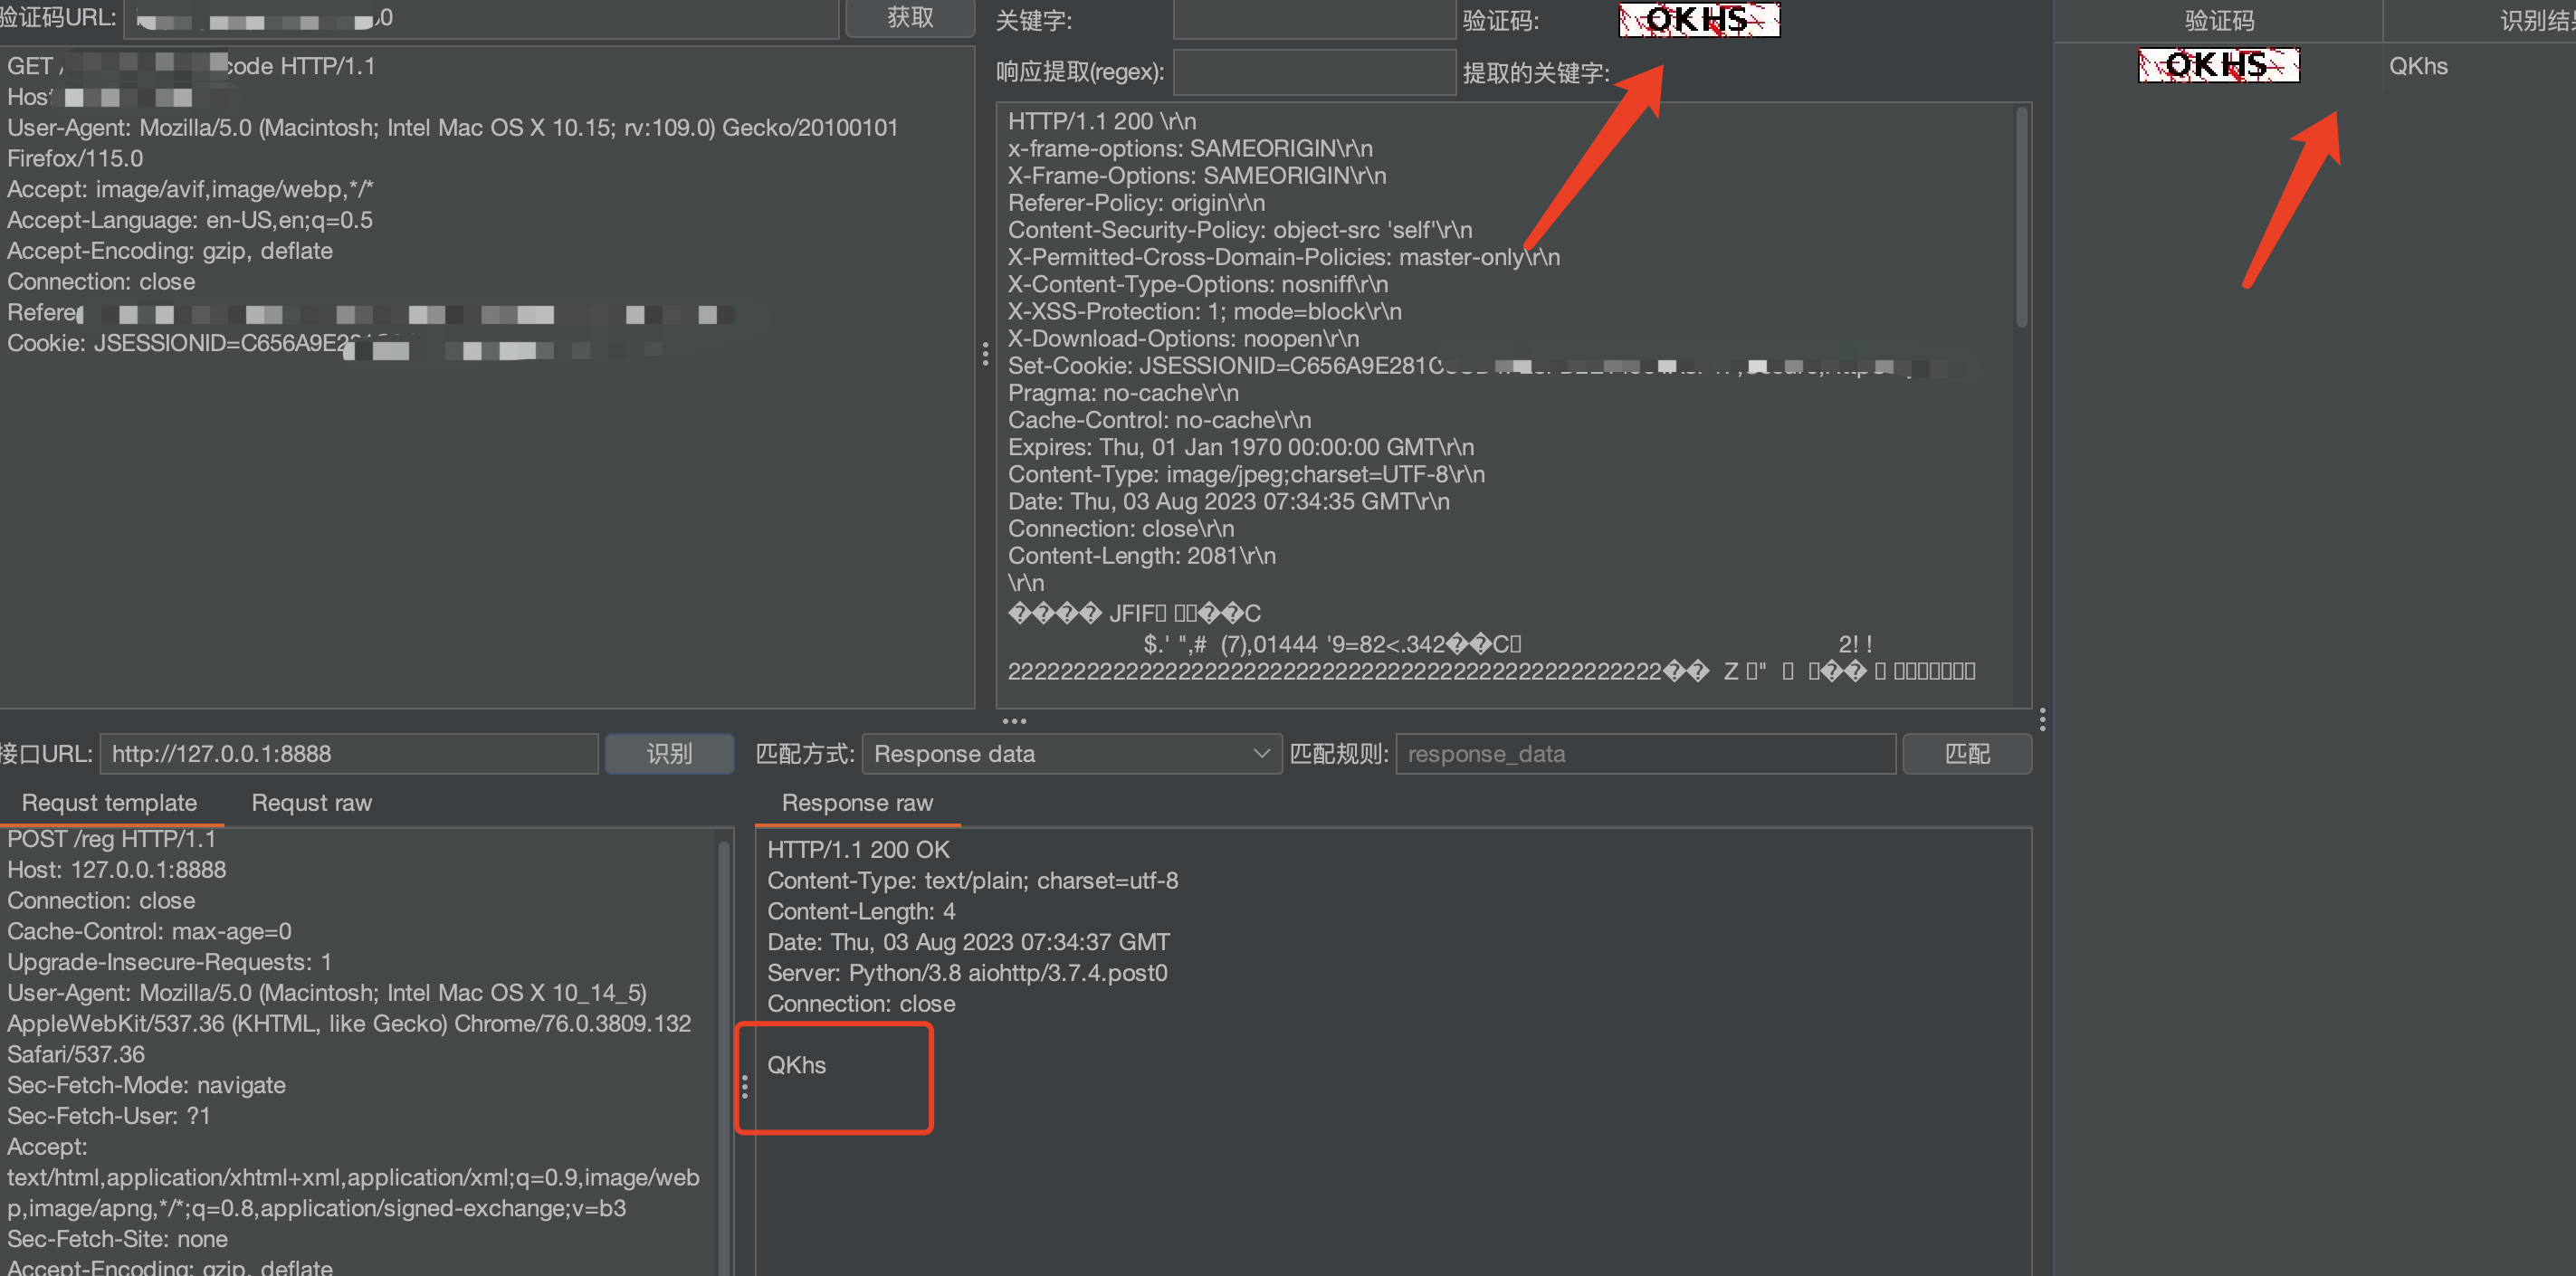
使用burp抓取获取验证码数据包,然后右键 captcha-killer -> send to captcha panel发送数据包到插件的验证码请求面板。
然后到切换到插件面板,点击获取即可拿到要识别的验证码图片内容。
注意:获取验证码的 cookie 一定要和 intruder 发送的 cookie 相同!
- 配置识别接口的地址和请求包
拿到验证码之后,就要设置接口来进行识别了。我们可以使用网上寻找免费的接口,也可以本地起一个验证码识别的服务。
部署

使用
数据包:
1 | |
然后我们把图片内容的位置用标签来代替。比如该例子使用的接口是post提交image参数,参数的值为图片二进制数据的 base64 编码后的 url 编码。那么 Request template(请求模版)面板应该填写如下:
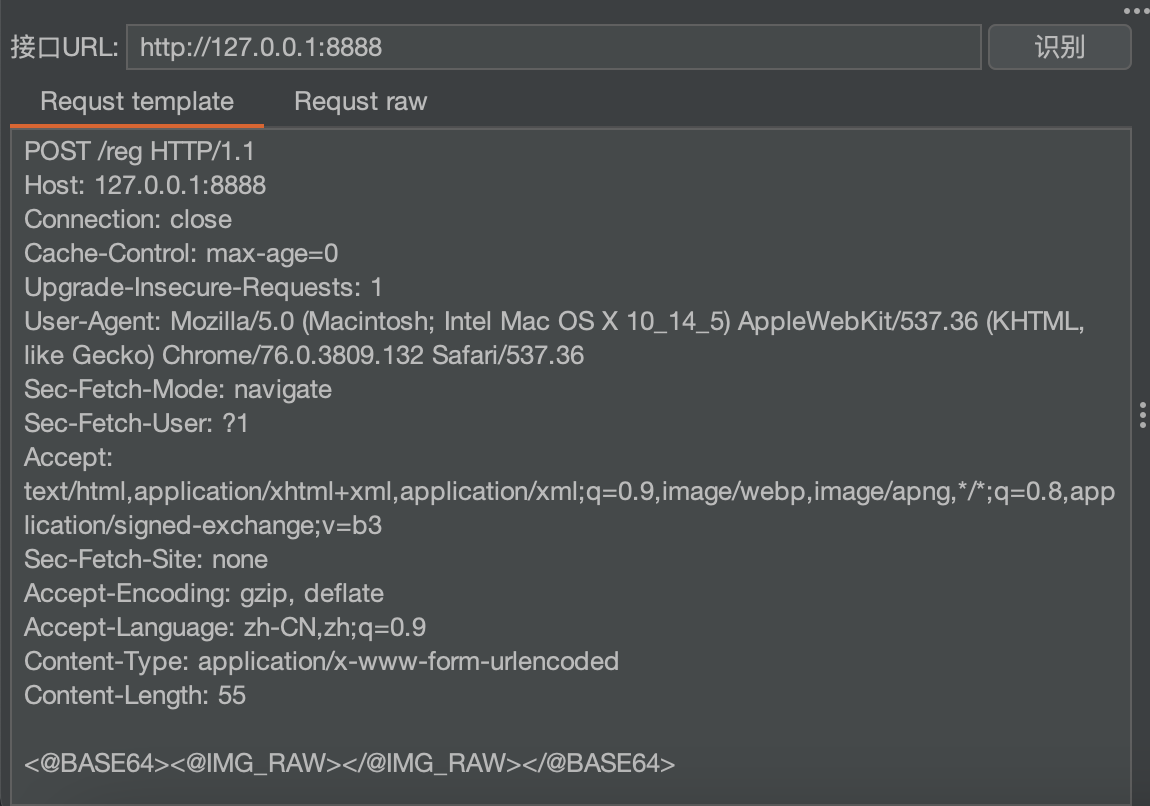
| ID | 标签 | 描述 |
|---|---|---|
| 1 | <@IMG_RAW></@IMG_RAW> | 代表验证码图片原二进制内容 |
| 2 | <@URLENCODE></@URLENCODE> | 对标签内的内容进行url编码 |
| 3 | <@BASE64></@BASE64> | 对标签内的内容进行base64编码 |
后点击“识别”即可获取到接口返回的数据包,同时在 request raw 可以看到调用接口最终发送的请求包。
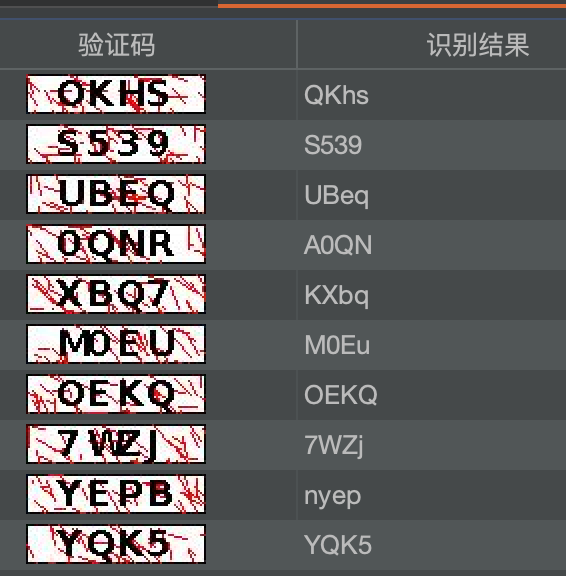
勉强够用
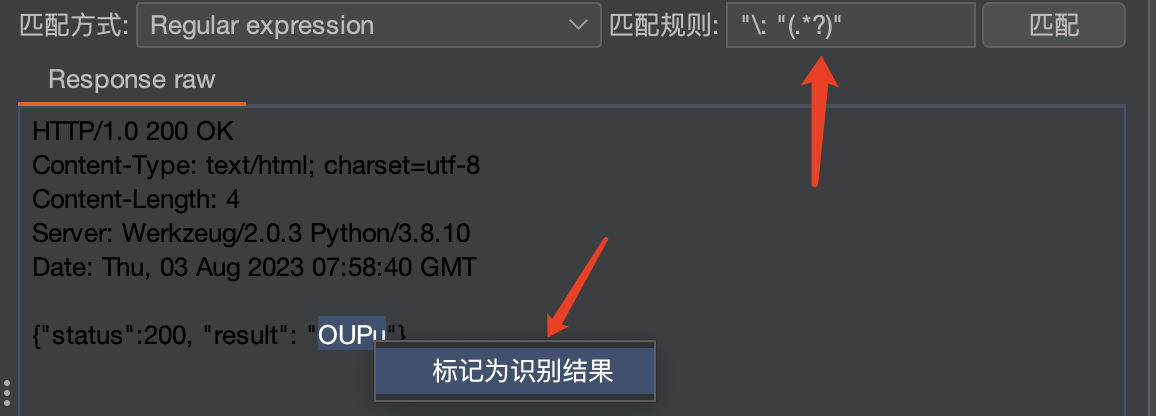
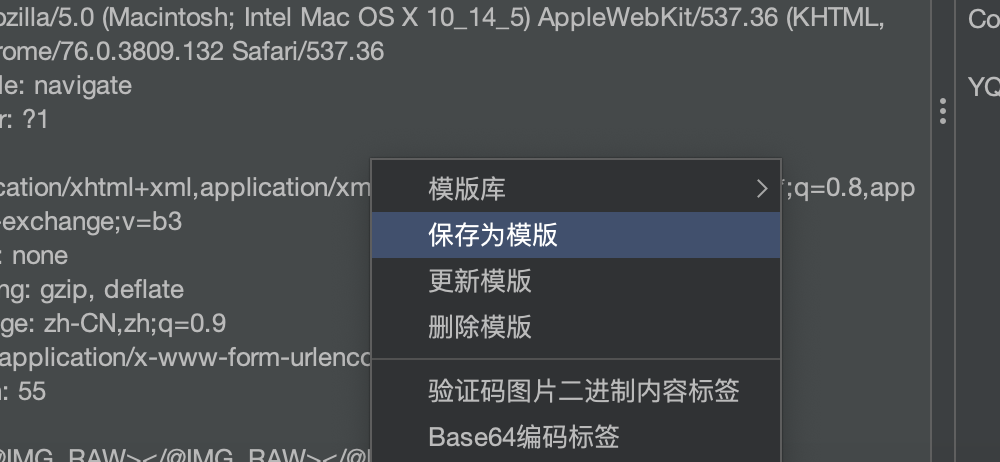
若返回包是 json,使用 Regular expression (正则表达式)来匹配,然后选择 匹配结果 右键标记为识别结果 ,系统会自动生成正则表达式规则。
将模版保存
在 Intruder 模块调用

ddddocr
简介
项目地址:https://github.com/sml2h3/ddddocr
使用 ocr_api_server 一键启动识别服务:https://github.com/sml2h3/ocr_api_server
最简单运行方式
1
2
3
4
5
6
7
8
9
10
11
12
13
14
15
16
17
18# 安装依赖
pip install -r requirements.txt -i https://pypi.douban.com/simple
# 运行 可选参数如下
# --port 9898 指定端口,默认为9898
# --ocr 开启ocr模块 默认开启
# --old 只有ocr模块开启的情况下生效 默认不开启
# --det 开启目标检测模式
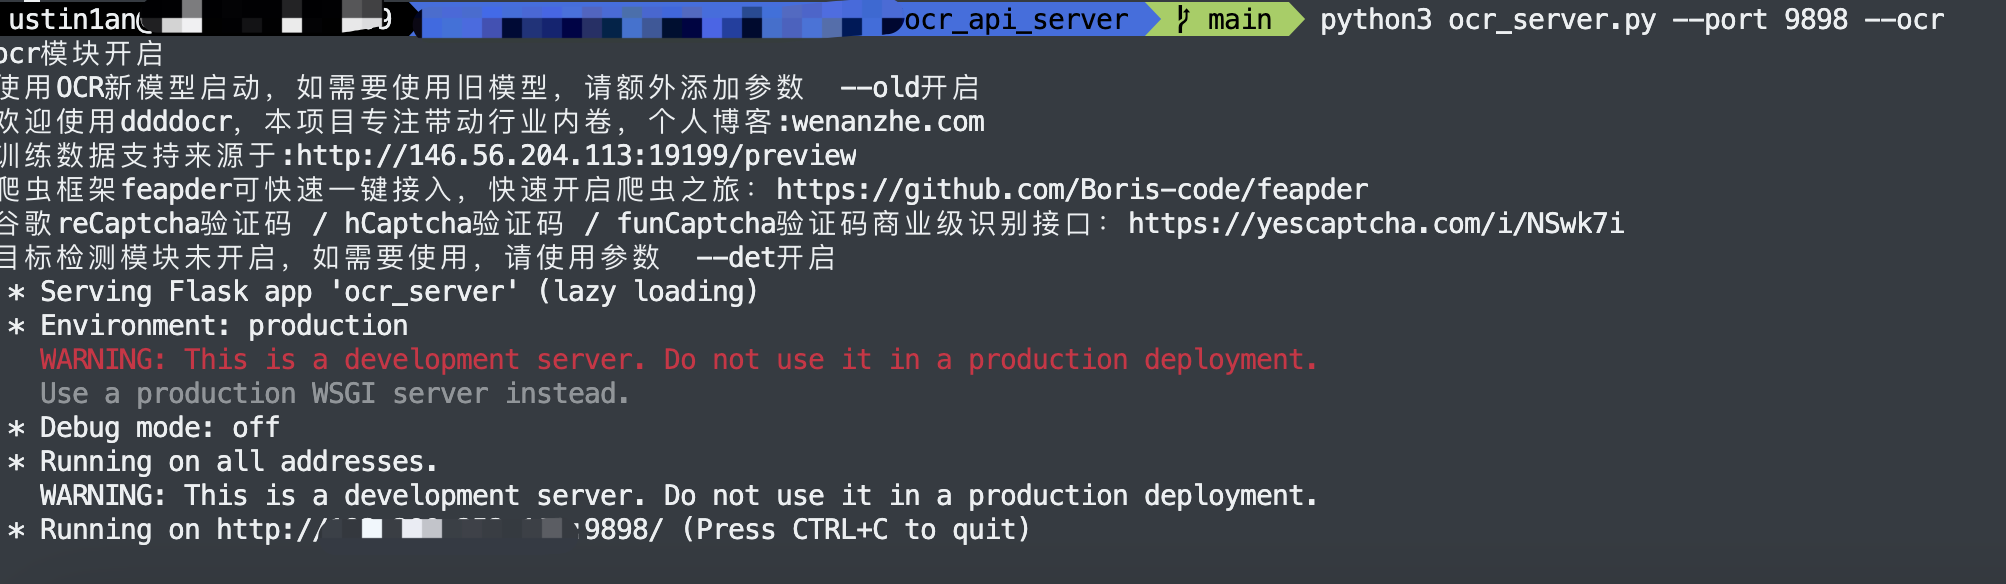
# 最简单运行方式,只开启ocr模块并以新模型计算
python ocr_server.py --port 9898 --ocr
# 开启ocr模块并使用旧模型计算
python ocr_server.py --port 9898 --ocr --old
# 只开启目标检测模块
python ocr_server.py --port 9898 --det
# 同时开启ocr模块以及目标检测模块
python ocr_server.py --port 9898 --ocr --det
# 同时开启ocr模块并使用旧模型计算以及目标检测模块
python ocr_server.py --port 9898 --ocr --old --detdocker 运行方式(目测只能在 Linux 下部署)
1
2
3
4
5
6
7
8
git clone https://github.com/sml2h3/ocr_api_server.git
cd ocr_api_server
# 修改entrypoint.sh中的参数,具体参数往上翻,默认9898端口,同时开启ocr模块以及目标检测
模块
# 编译镜像
docker build -t ocr_server:v1 .
# 运行镜像
docker run -p 9898:9898 -d ocr_server:v1
接口
1 | |
部署
安装下载项目依赖
1
2
git clone https://github.com/sml2h3/ocr_api_server.git
python3 -m pip install -r requirements.txt -i https://pypi.douban.com/simple运行开启
1
2
3
4
5
6
7
8
9
10
# 最简单运行方式,只开启ocr模块并以新模型计算
python3 ocr_server.py --port 9898 --ocr
# 开启ocr模块并使用旧模型计算
python3 ocr_server.py --port 9898 --ocr --old
# 只开启目标检测模块
python3 ocr_server.py --port 9898 --det
# 同时开启ocr模块以及目标检测模块
python3 ocr_server.py --port 9898 --ocr --det
# 同时开启ocr模块并使用旧模型计算以及目标检测模块
python3 ocr_server.py --port 9898 --ocr --old --det接口格式类型
常用请求模版:
1 | |
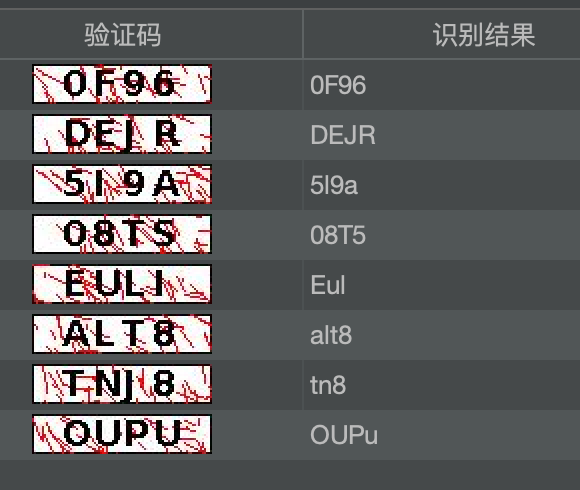
识别准确率还是可以的